Deploying F5 BIG-IP LTM VE within GNS3 (part-1)
September 9, 2016 21 Comments
One of the advantages of deploying VMware (or VirtualBox) machines inside GNS3, is the available rich networking infrastructure environment. No need to hassle yourself about interface types, vmnet or private? Shared or ad-hoc?
In GNS3 it is as simple and intuitive as choosing a node interface and connect it to whatever other node interface.
In this lab, we are testing basic F5 BIG-IP LTM VE deployment within GNS3. The only Virtual machine used in this lab is F5 BIG-IP all other devices are docker containers:
- Nginx Docker containers for internal web servers.
- ab(Apache Benchmark) docker container for the client used for performence testing.
- gns3/webterm containers used as Firefox browser for client testing and F5 web management.
Outline:
- Docker image import
- F5 Big-IP VE installation and activation
- Building the topology
- Setting F5 Big-IP interfaces
- Connectivity check between devices
- Load balancing configuration
- Generating client http queries
- Monitoring Load balancing
Devices used:
- gns3/openvswitch: OVS switch container.
- gns3/webterm: GUI browser container.
- ajnouri/nginx: nginx web server container.
- ajnouri/ab: Apache Benchmark container to generate client requests.
- F5 Big IP VE: F5 Load balancer Virtual Machine.
Environment:
- Debian host GNU/Linux 8.5 (jessie)
- GNS3 version 1.5.2 on Linux (64-bit)
System requirements:
- F5 Big IP VE requires 2GB of RAM (recommended >= 8GB)
- VT-x / AMD-V support
The only virtual machine used in the lab is F5 Big-IP, all other devices are Docker containers.
1.Docker image import
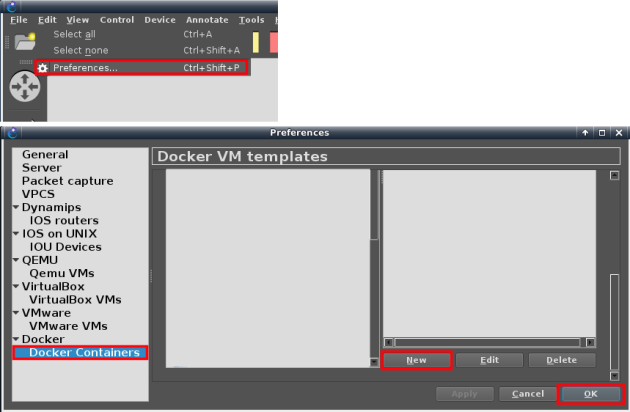
Create a new docker template in GNS3. Create new docker template: Edit > Preferences > Docker > Docker containers and then “New”.
Choose “New image” option and type the Docker image in the format provided in “devices used” section <account/<repo>>, then choose a name (without the slash “/”).
Note:
By default GNS3 derives a name in the same format as the Docker registry (<account>/repository) which can cause an error in some earlier versions. In the latest GNS3 versions, the slash “/” is removed from the derived name.
Installing gns3/openvswitch:
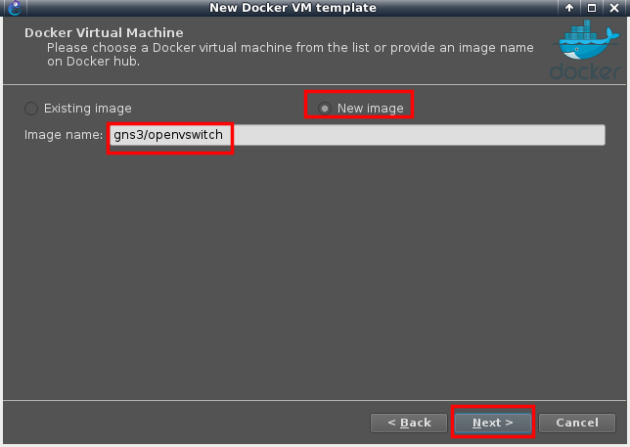
Set the number of interfaces to eight and accept default parameters with “next” until “finish”.
– Repeat the same procedure for gns3/webterm

Choose a name for the image (without slash “/”)

Choose vnc as the console type to allow Firefox (GUI) browsing
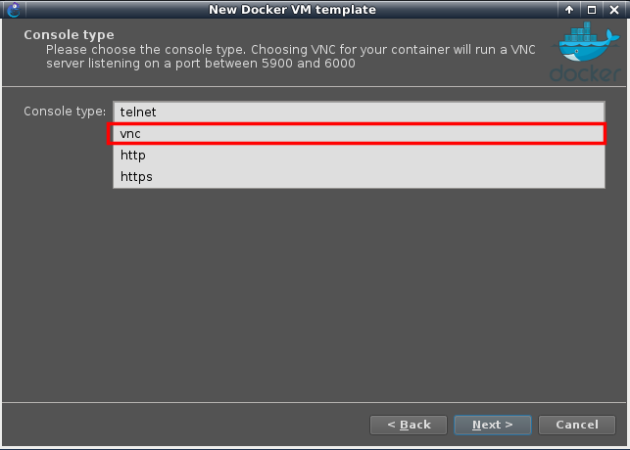
And keep the remaining default parameters.
– Repeat the same procedure for the image ajnouri/nginx.
Create a new image with name ajnouri/nginx
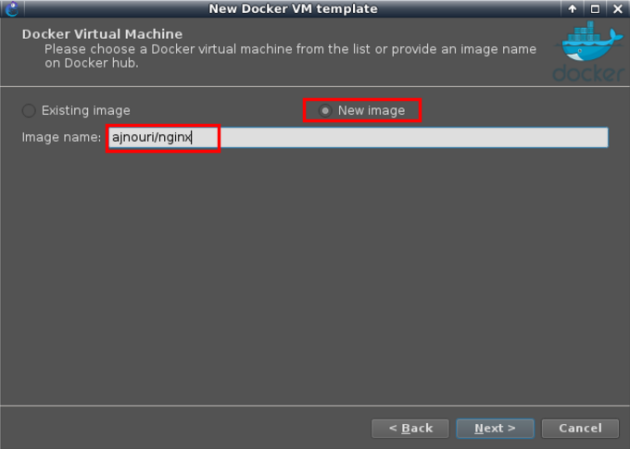
Name it as you like
And keep the remaining default parameters.
2. F5 Big-IP VE installation and activation
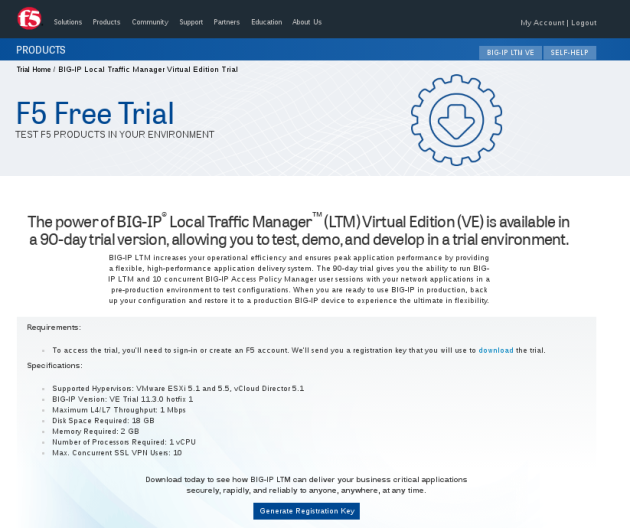
– From F5 site, import the file BIG-11.3.0.0-scsi.ova. Go to https://www.f5.com/trial/big-ip-ltm-virtual-edition.php
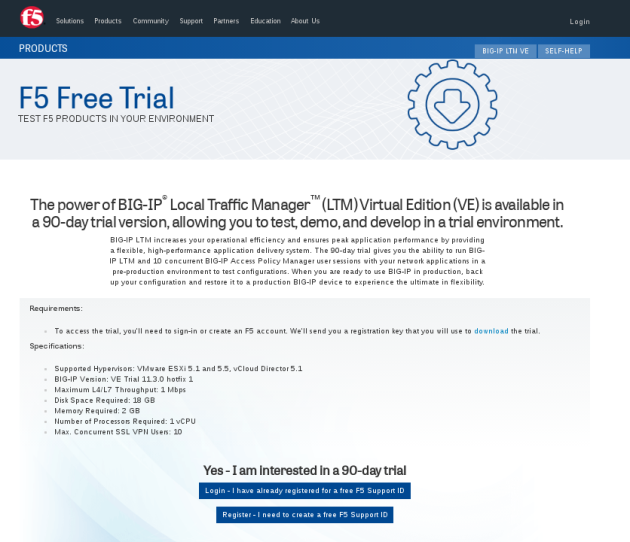
You’ll have to request a registration key for the trial version that you’ll receive by email.
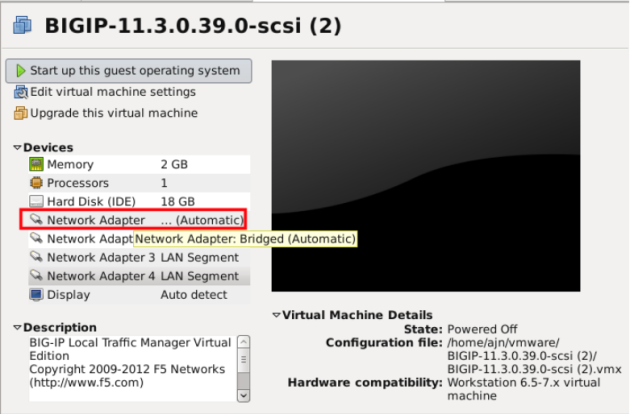
Open the ova file in VMWare workstation.
– To register the trial version, bridge the first interface to your network connected to Internet.
– Start the VM and log in to the console with root/default

– Type “config” to access the text user interface.
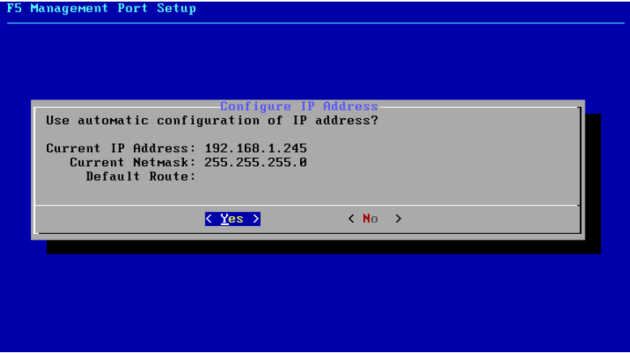 – Choose “No” to configure a static IP address, a mask and a default gateway in the same subnet of the bridged network. Or “Yes” if you have a dhcp server and want to get a dynamic IP.
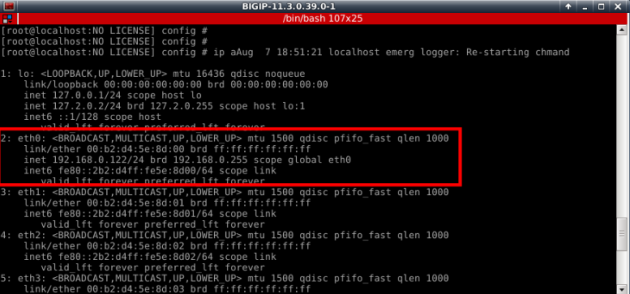
– Check the interface IP.
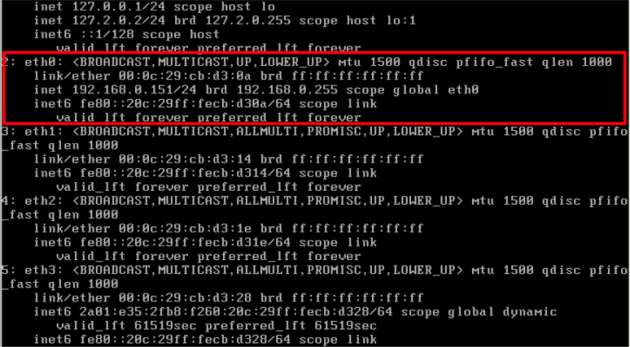
– Ping an Internet host ex: gns3.com to verify the connectivity and name resolution.
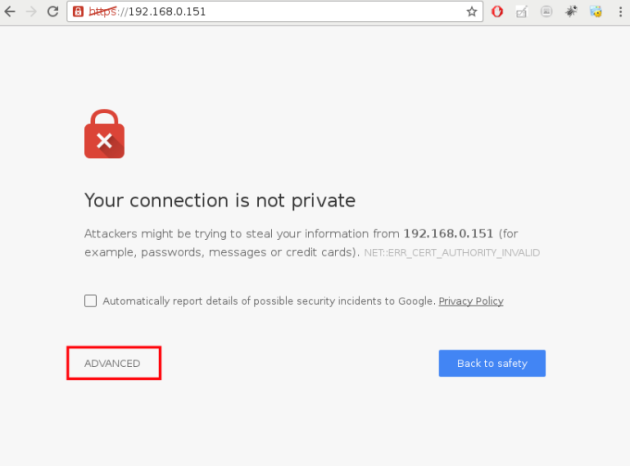
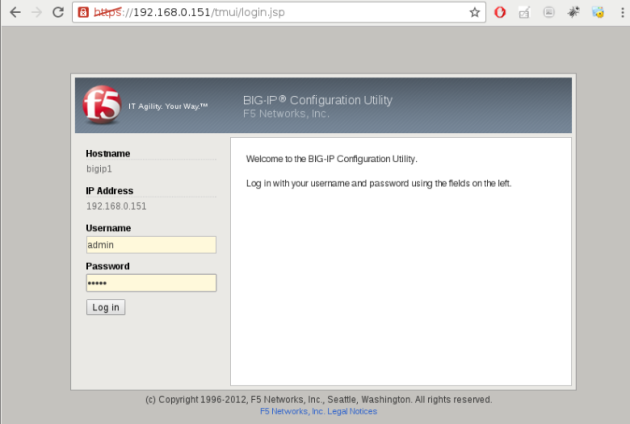
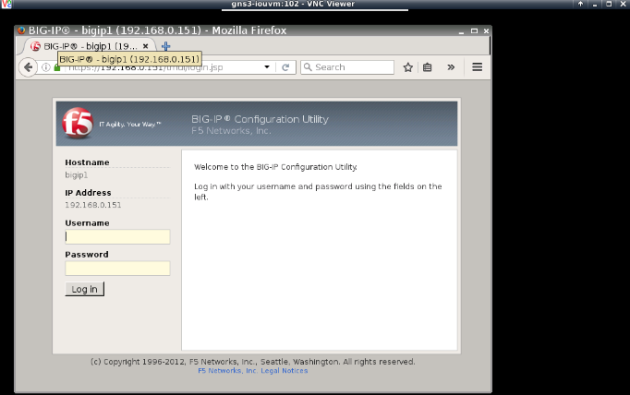
– Browse Big-IP interface IP and accept the certificate.
Use admin/admin for login credentials
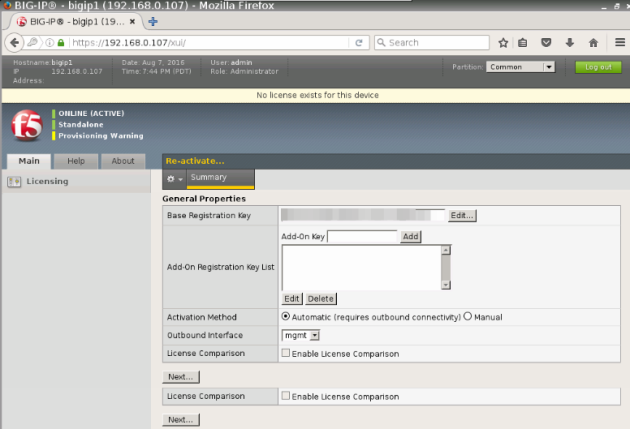
Put the key you received by email in the Base Registration Key field and push “Next”, wait a couple of seconds for activation and you are good to go.
Now you can shutdown F5 VM.
3. Building the topology
Importing F5 VE Virtual machine to GNS3
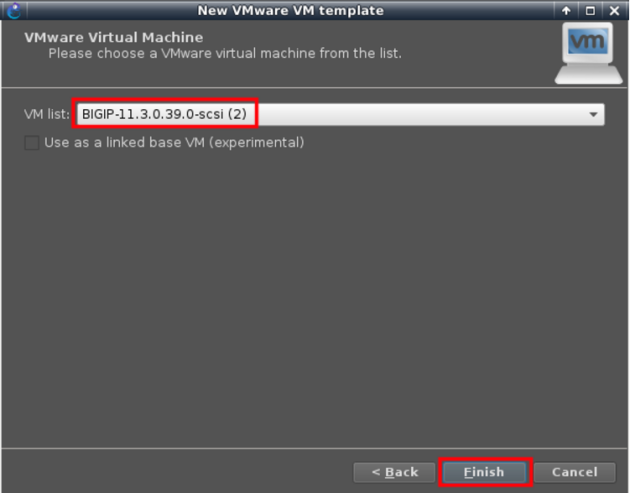
From GNS3 “preference” import a new VMWare virtual machine
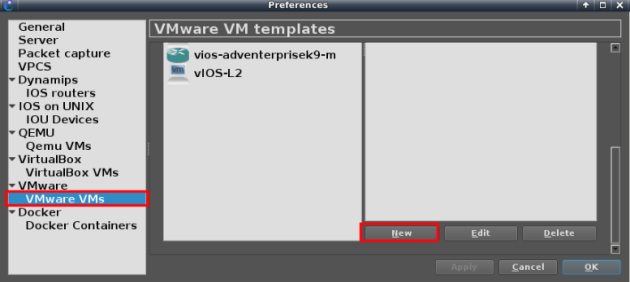
Choose BIG-IP VM we have just installed and activated
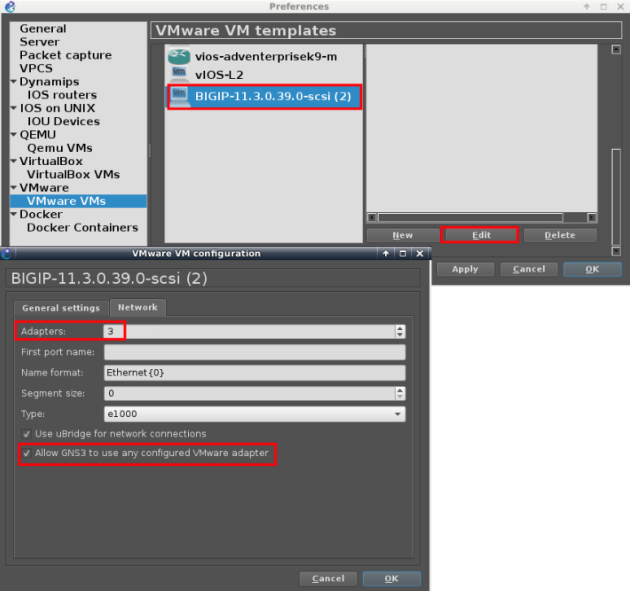
Make sure to set minimum 3 adapters and allow GNS3 to use any of the VM interfaces
Topology
Now we can build our topology using BIG-IP VM and the Docker images installed.
Below, is an example of topology in which we will import F5 VM and put some containers..
Internal:
– 3 nginx containers
– 1 Openvswitch
Management:
– GUI browser webterm container
– 1 Openvswitch
– Cloud mapped to host interface tap0
External:
– Apache Benchmark (ab) container
– GUI browser webterm container
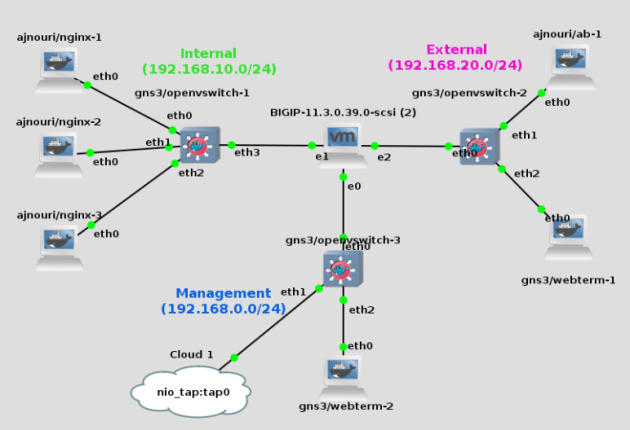
Notice the BIG-IP VM interface e0, the one priorly bridged to host network, is now connected to a browser container for management.
| I attached the host interface “tap0” to the management switch because, for some reasons, without it, arp doesn’t work on that segment. |
Address configuration:
– Assign each of the nginx container an IP in subnet of your choice (ex: 192.168.10.0/24)
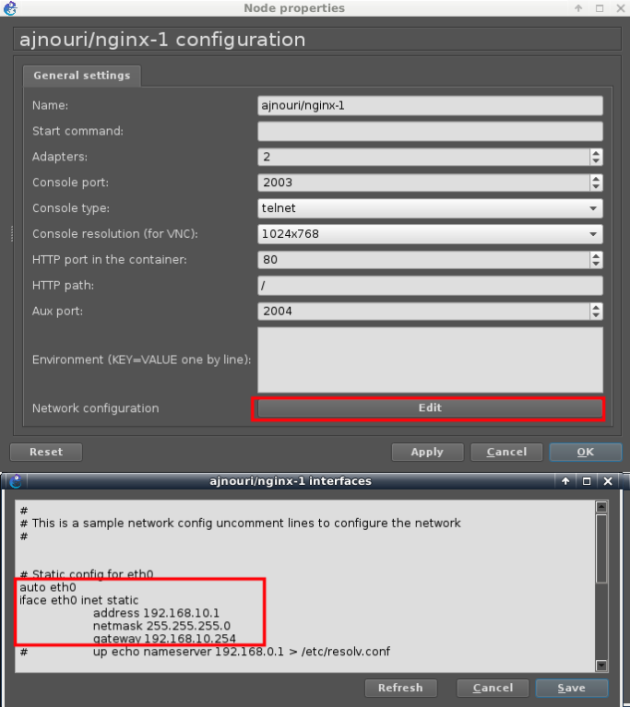
In the same manner:
192.168.10.2/24 for ajnouri/nginx-2
192.168.10.3/24 for ajnouri/nginx-3
On all three nginx containers, start nginx and php servers:
service php5-fpm start

service nginx start
– Assign an IP to the management browser in the same subnet as BIG-IP management IP
192.168.0.222/24 for gns3/webterm-2
– Assign addresses default gateway and dns server to ab container and webterm-1 containers
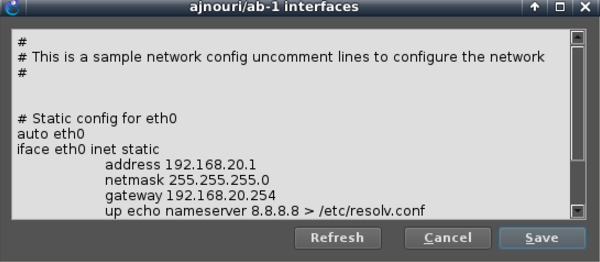
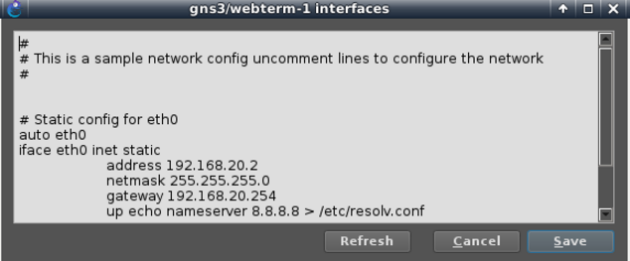
And make sure both client devices resolve ajnouri.local host to BIG-IP address 192.168.20.254
echo "192.168.20.254 ajnouri.local" >> /etc/hosts
– Openvswitch containers don’t need to be configured, it acts like a single vlan.
– Start the topology
4. Setting F5 Big-IP interfaces
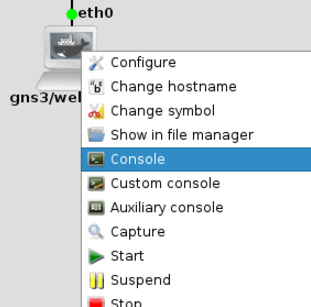
To manage the load balancer from the webterm-2, open the console to the container, this will open a Firefox from the container .
Browse the VM management IP https://192.168.0.151 and exception for the certificate and log in with F5 BigIP default credentials admin/admin.
Go through the initial configuration steps
– You will have to set the hostname (ex: ajnouri.local), change the root and admin account passwords
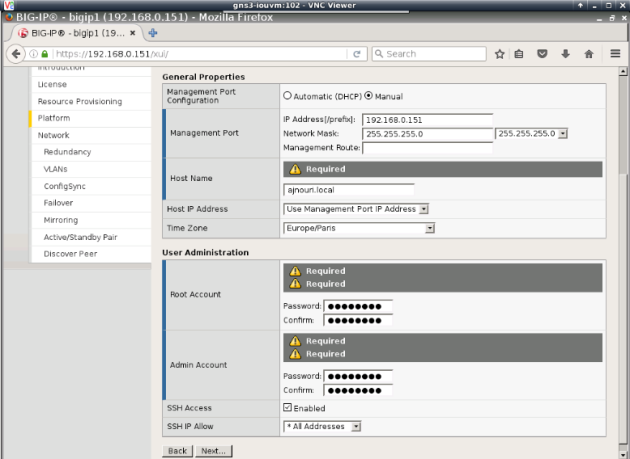
You will be logged out to take into account password changes, log in back
– For the purpose of this lab, not redundancy not high availability

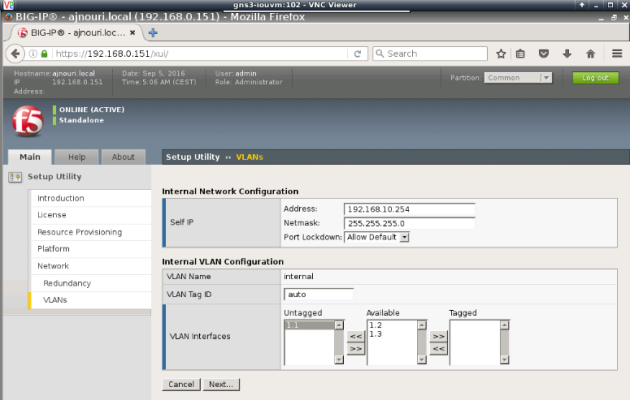
– Now you will have to configure internal (real servers) and external (client side) vlans and associated interfaces and self IPs.
(Self IPs are the equivalent of VLAN interface IP in Cisco switching)
Internal VLAN (connected to web servers):
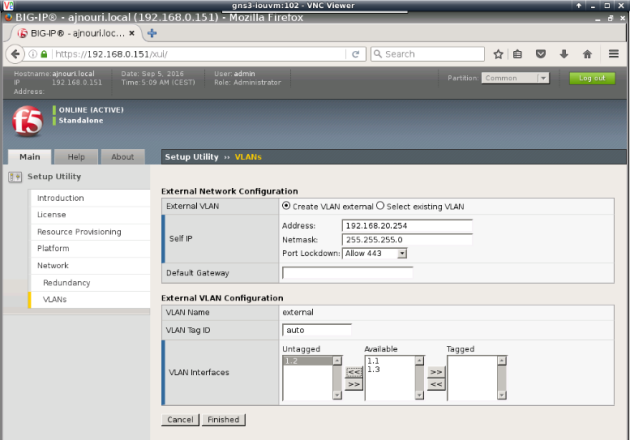
External VLAN (facing clients):
5. Connectivity check between devices
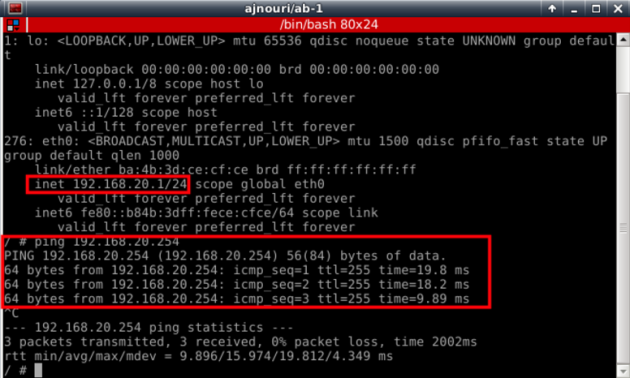
Now make sure you have successful connectivity from each container to the corresponding Big-IP interface.
Ex: from ab container
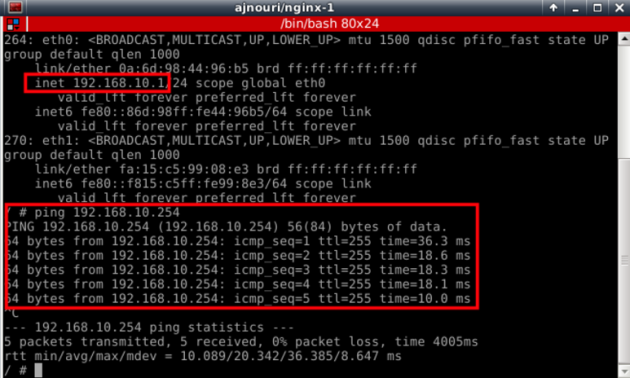
Ex: from nginx-1 server container
The interface connected to your host network will get ip parameters (address, gw and dns) from your dhcp server.
6. Load balancing configuration
Back to the browser webterm-2
For BIG-IP to load balance http requests from client to the servers, we need to configure:
- Virtual Server: single entity (virtual server) visible to client0
- Pool : associated to the Virtual server and contains the list of real web servers to balance between
- Algorithm used to load balance between members of the pool
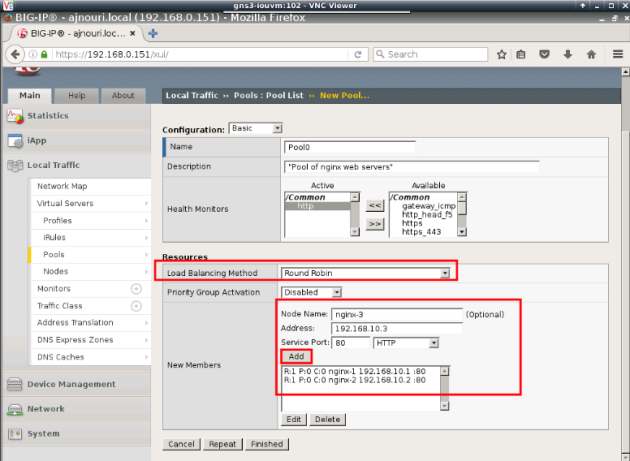
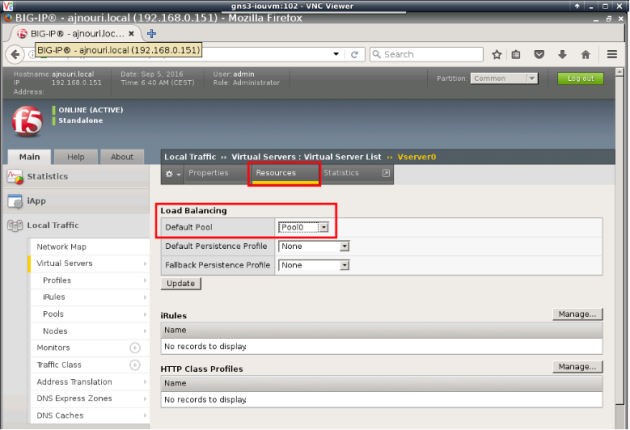
– Create a pool of web servers “Pool0” with “RoundRobin” as algorithm and http as protocol to monitor the members.
-Associate to the virtual server “VServer0” to the pool “Pool0”
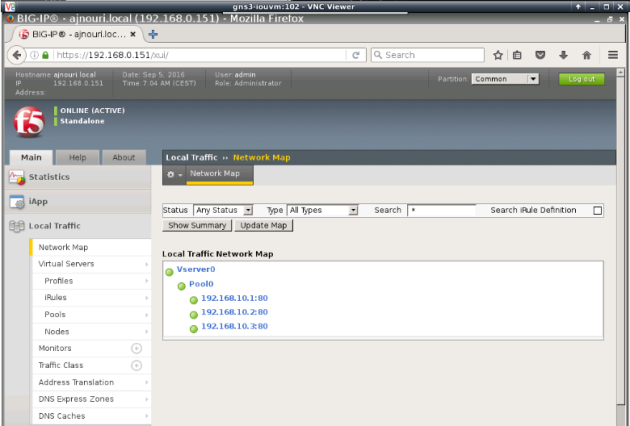
Check the network map to see if everything is configured correctly and monitoring shows everything OK (green)
From client container webterm-1, you can start a firefox browser (console to the container) and test the server name “ajnouri/local”
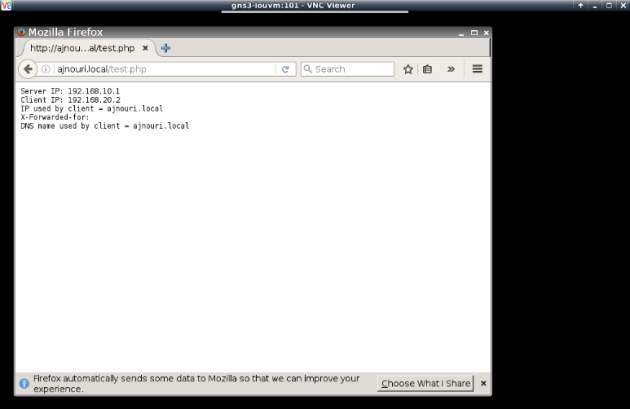
If everything is ok, you’ll see the php page showing the real server ip used, the client ip and the dns name used by the client.
Everytime you refresh the page, you’ll see a different server IP used.
7. Performance testing
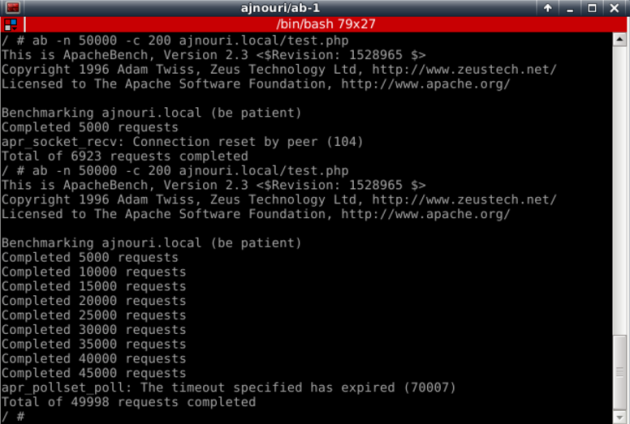
with Apache Benchmark container ajnouri/ab, we can generate client request to the load balancer virtual server by its hostname (ajnouri.local).
Let’s open an aux console to the container ajnouri/ab and generate 50.000 connections with 200 concurrent ones to the url ajnouri.local/test.php
ab -n 50000 -c 200 ajnouri.local/test.php
8. Monitoring load balancing
Monitoring the load balancer performance shows a peek of connections corresponding to Apache benchmark generated requests

In the upcoming part-2, the 3 web server containers are replaced with a single container in which we can spawn as many servers as we want (Docker-in-Docker) as well as test a custom python client script container that generates http traffic from spoofed IP addresses as opposed to a container (Apache Benchmark) that generate traffic from a single source IP.


